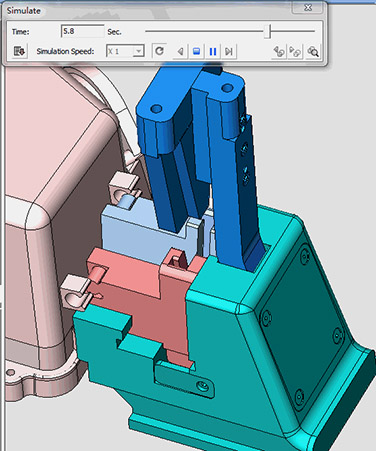
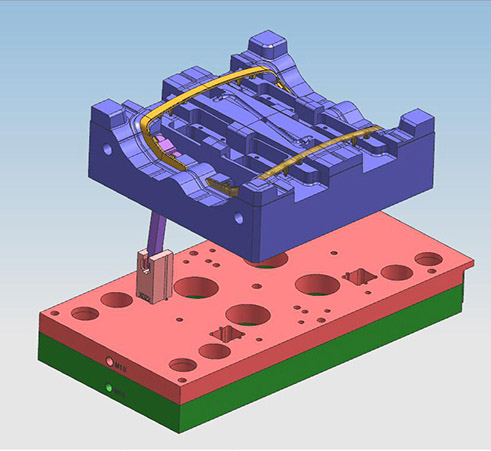
Mould of Angular lifter
2024-11-07
The mold Angular lifter, also known as the tilting tip or angular lifter, is a mechanism used in mold design to form the internal hook of the product. It is suitable for relatively simple hook situations.
1. When the internal buckle position of the required product cannot be directly ejected in the mold cavity, a angular lifter is needed to achieve demolding.
2. The angular lifter can not only play the role of core pulling, but also is very helpful for product ejection.
3. The angular lifter is generally used to deal with some products with hooks and buckles.
4. The angular lifter must be designed with a 5-10mm long straight position as a sealing position and a contact surface. The core pulling distance should be at least 2mm greater than the buckle depth. The angular lifter must have enough sliding space on the lower surface of the product, otherwise the glue scraping phenomenon will occur.


Many of our parts need to use the design of the mold angular lifter, such as Audio-visual appliances and Automotive electronics, etc. The outer shell and the inner shell are sealed by buckles. We have enough experience to use the design of mold angular lifter.
How to use angular lifter:
1. Calculate the parameters of angular lifter: First calculate the tripping stroke of the angular lifter, and then calculate the slope of the angular lifter according to the ejection stroke
2. Design the sealing position of the lateral movement direction of the angular lifter: horizontal sealing is preferred for sealing, and vertical sealing can also be used. When using vertical sealing, it is necessary to pay attention to whether the glue position of the product buckle position will deform laterally with the angular lifter. If the space for lateral movement of the angular lifter is limited, vertical sealing can be used
3. Design the processing reference position of the angular lifter: the processing reference position is based on the ejection direction of the glue position.
4. Make the inclined surface of the angular lifter: From the processing reference position, make the inclined surface of the angular lifter downwards
5. Adjust the thickness of the angular lifter in the lateral movement direction: When the total length of the angular lifter is less than 100mm, the thickness of the angular lifter is guaranteed to be at least 6mm thick. If the total length exceeds 100mm, the thickness of the angular lifter must be at least 8mm. If this thickness cannot be achieved, shorten the total length of the angular lifter
6. Make the two sides of the angular lifter sealed with glue: The sealing glue can be based on the strength and position of the angular lifter, whether it needs to exceed the side of the glue position. If the strength is not enough, it can be Beyond the side of the angular lifter, just do the sealing requirements
7. Make an air-avoidance hole for the angular lifter to pass through the template: In order to ensure the smooth movement of the angular lifter, it is necessary to make an air-avoidance hole on the template
8. Make the pipe block of the angular lifter: The pipe block is used to fix the angular lifter to ensure its stability during movement
9. Design the angular lifter seat: The design of the angular lifter seat needs to take into account the smooth movement of the angular lifter and sufficient movement space
10. Consider the anti-loosening problem: If the screws connected to the angular lifter are loose, the angular lifter mechanism will fail, seriously affecting the life of the mold. It can be prevented from loosening by adding spring washers, etc.
11. Use movable blocks to achieve large-angle ejection: Installing movable blocks between the inclined ejector and the inclined ejector seat can achieve large-angle ejection of the inclined ejector, so that the product can be smoothly separated from the mold, and the inclined ejector will not break due to the change in force direction
12. Use inclined ejector mold tooling to assist assembly: When disassembling, maintaining, and assembling the inclined ejector mold, special tooling can be used to assist in saving time and manpower and ensuring assembly accuracy
13. Improve the inclined ejector structure to reduce wear: You can use methods such as adding a rotating shaft to reduce the wear of the inclined ejector during movement and increase the service life of the mold
14. Use spring ejection: For fixed mold inclined ejectors, you can use spring ejection, omit the ejector plate mechanism, reduce the mold volume, and improve the ejection stability by setting slides and guides
Issues to note when designing inclined ejectors:
1. The inclined ejector not only plays the role of core pulling, but also plays the role of ejection.
2. The inclined ejector must be designed with a 5-10mm long straight body position as a sealing position and as a contact surface.
3. The core pulling distance should be at least 2mm greater than the undercut depth.
4. There should be enough space for the angular lifter to slide in the direction of the product glue surface, and there should be no scraping of glue or interference with other parts.


